Tuesday, November 27, 2012

Getting Fancy


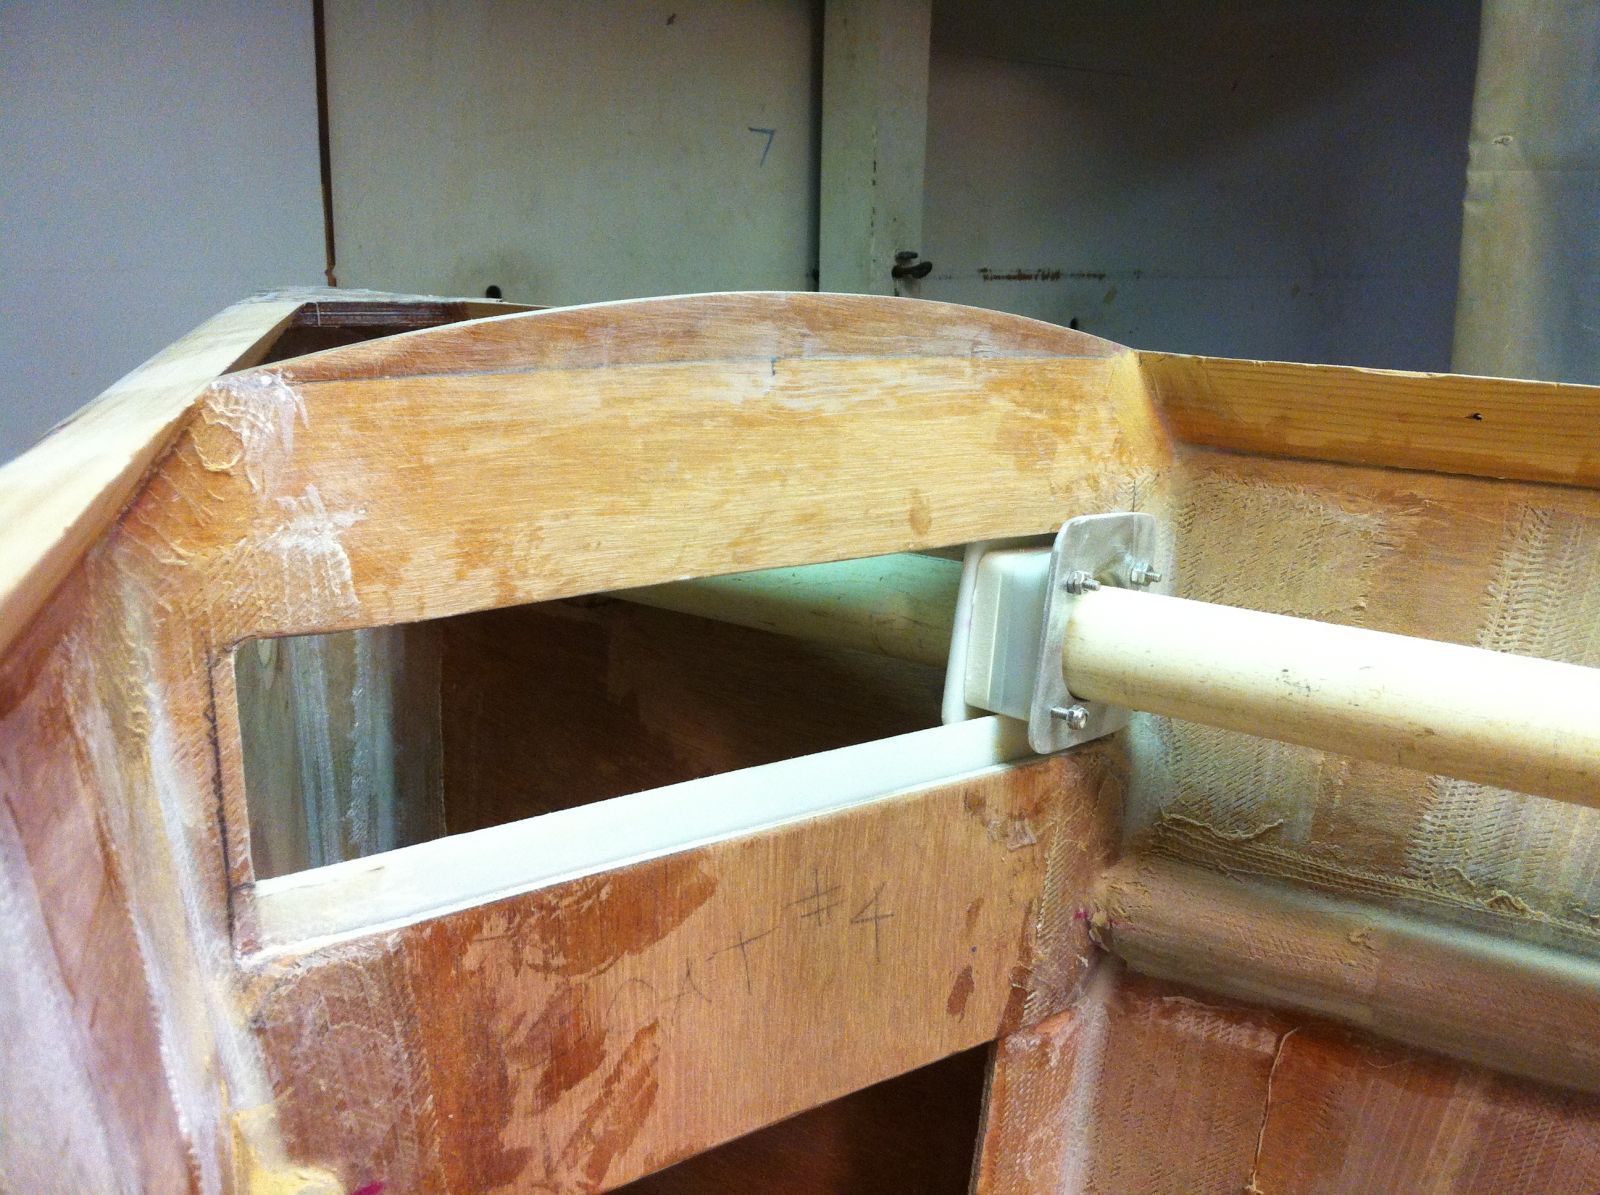
New Bow pole articulation track installed!


So during thanksgiving holiday Ben came up to visit and brought along new parts for my boat!  Its a piece of Condensed Foam wrapped in carbon and vacuum bagged.  Then he built a track and car using Delrin. 


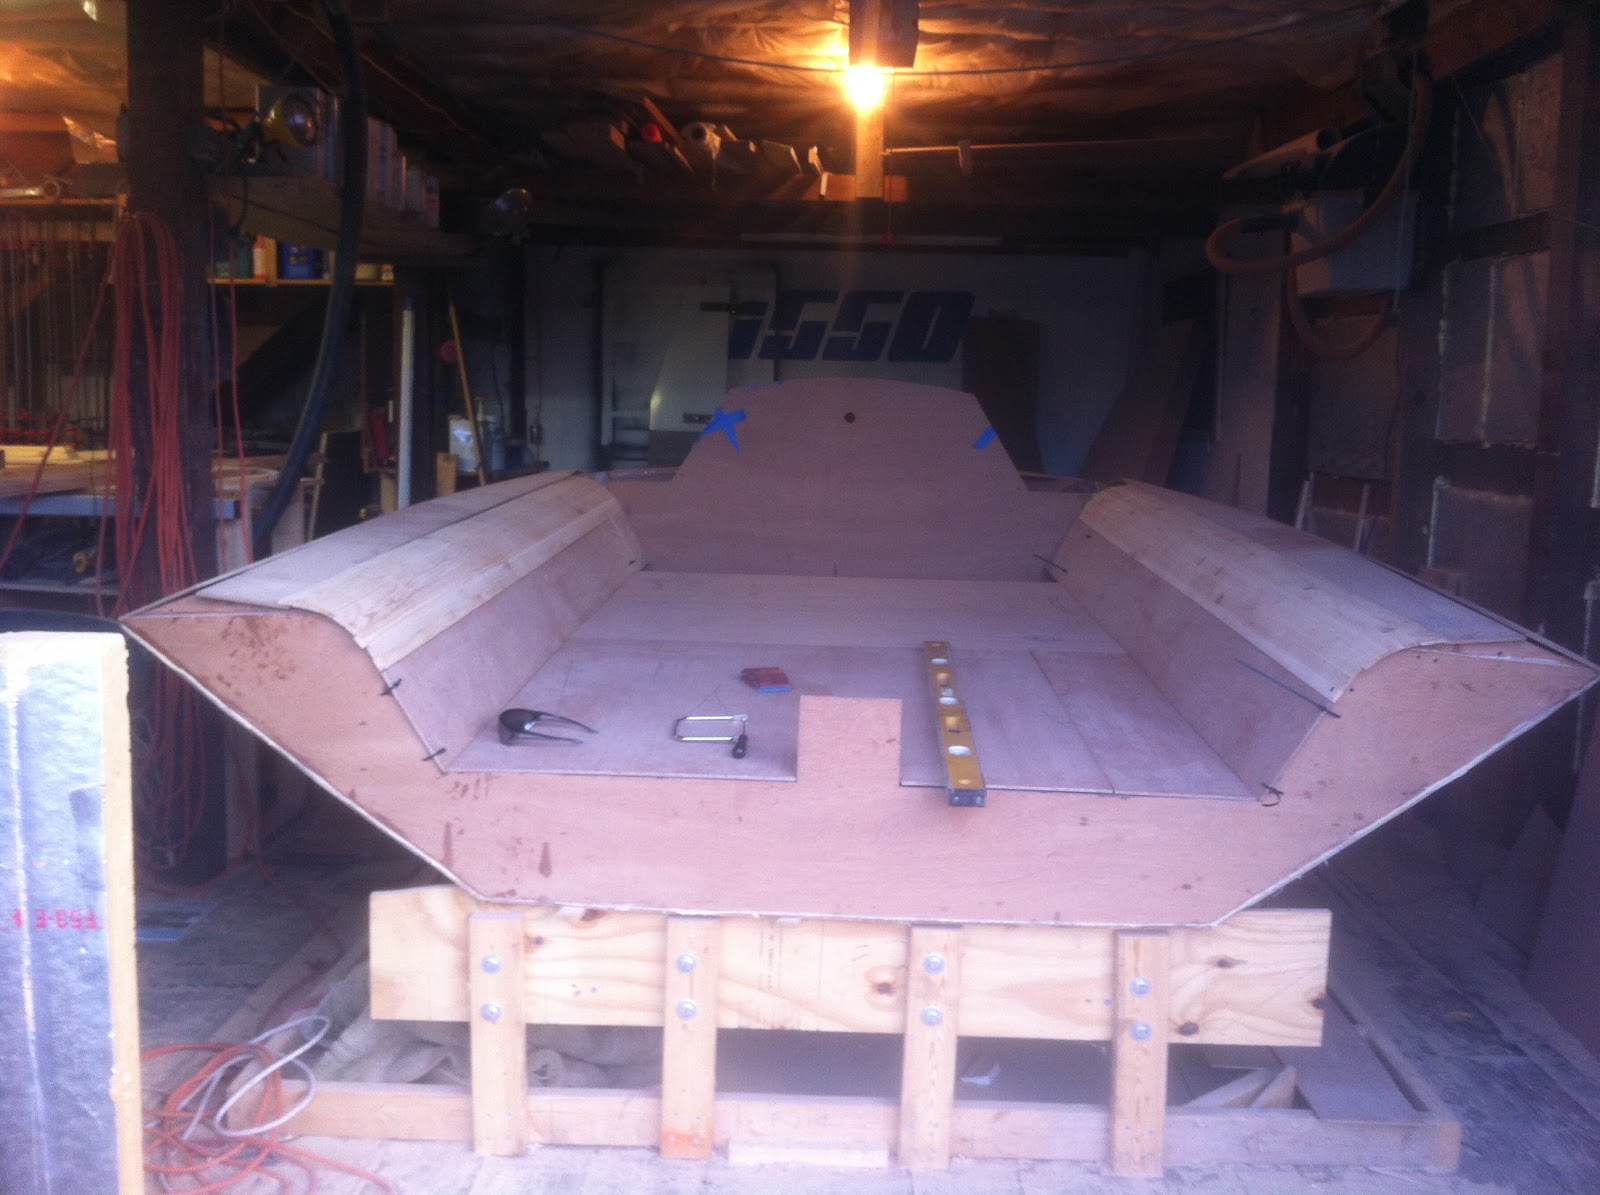
Here is a shot when it first got to the shop.  I sent him a template so he could get the correct radius and hull shape. 


Working on getting it fit in. 


Fitted up and waiting for glue. 


Installed! 


Mounted the track.


The track and car are basically a dovetail joint i am extremely impressed on how well it slides. 
We were going to used curved harken track and a special radius car but that would of cost about $500 and the car is like 5 inches long and i would of lost some throw from side to side and that would not allow me to articulate as far. 


I need to build two 3 inch sleeves one for the car and one for the bow.


So what are the advantages on this setup vs the other Three? (My opinion) 


http://i550na.org/eric/blog/articulating-sprit-construction

This is my favorite setup besides my own.  The only thing i don't like about is that you are creating high stress points at the bow exit point and at the car.  There is no sleeve and all the pressure is concentrated on two points and makes it easier to break the pole.  Also i have my car mounted at 27 inches from the bow no 18 so this should take some stress off the car as well.   The good part is that its simple and easy to build.  Also simple to jibe.  You can move the pole at any time to any place. 


This is a standard above deck articulating pole.  This is simple to build and you can articulate the pole as far as you want and are not restricted by your hull. The disadvantage is its more difficult to jibe and control.  I also like the look of a thru hull pole. 


Then there is a standard straight pole which is super simple and easy to sail with but you dont get the advantage of articulation.   


So i tried to combine the best of all the options.  I don't think being able to articulate any further than the hull allows will really be that detrimental and i think being able to control the articulation from the back of the pole vs the front with make it much easier to control and jibe.  I used the track so i was able to use sleeves vs rings to add strength and have hopefully a very reliable system. 


Tuesday, November 20, 2012

Getting a lot done!


So again i have a ton of photos for the blog update.  I figure people like pictures more than me blabbing about things.  General overview is i have extended the bow about 1.75 inches using a trick from the PDX boys.  Finished the bunks installed the chain plate gussets and have carbon on the keel.  


I used the cutoffs from the original stem flipped them over glued them together then glued them on the bow.  I measured my boat and realized i was just about 2 inches short of the max class rule.  So why not make the bow pointer and the boat a bit longer. 


I made little blocks with screws in them and hot glue to attach them to the hull in order to hold the stem to the bow. 


A bunch of lead from a job site.  This was left over from 132,000 lbs of lead they installed i wish they had been a few thousand lbs off not just 260.  Using this to make another bulb for a buddy of mine for another boat.  


Bunks are ready to be installed. 


My laser battery was dead so i used string like crazy to get my chain plates in the right spot. 


Here is a PDF of the measurements for the chain plate gussets for the C-Tech rig. 


The chain plates point at the mast base so once you get your measurements just use string that goes from the the Frame corner to the mast base and use that as your angle line. 


Using Popsical sticks to hold everything straight :) 


Fillet is done.  Carbon is also on now just no picture of it. 


I added carbon to the trailing edge to hopefully make it stronger and less prone to chipping when i am raising and lowering it in the sleeve. 


Keel Fared and ready for carbon. 


Carbon cut and ready to go on. 


I put one layer over the front and one on each side below.  This was simply because i didn't have one big enough piece to do it. 


Boom keel is a brick shithouse now.  I have 5 layers of 10oz uni on each side and one layer of i believe 10oz woven around the outside.  

So just a little info on my bow sprit design.  Here are some drawings my friend from NEB drew up.  Sorry about the dim light and camera photo he drew these and took photos when he has no power during Sandy. 


Basically we are building an arched carbon foam track 27 inches from the pivot point at the back of the stem  Then a Deleon car and track mounted to pull the back of the sprit side to side.  Then in the bow we will have a two collars one being oval shape opening that mounts to the hull of the boat and the other will have a round opening just enough for the sprit that will nest inside of the one mounted in the hull and hopefully stop most of the water from entering the boat.  I am also building a false floor in from the stem to frame 18 with drain holes on each side so any water that does come in drains out That was also stolen from the PDX guys. 


Wednesday, October 24, 2012

Finally have spent some time in the last few weeks working on the boat and am starting to get some done! I have a bunch of photos so i will let them do the talking.  Also my beer and hour count is updated!  


Decided to do a two part seat so when the boat is heeled and i am hiking its more comfortable. 


Ian testing the seat


Back angle.


Front Angle


Rough Fit of cedar strip and top pieces.


Test fit was a success


Glued up.


Sanded Smooth


Yes this is a beer tap installed i mean why not? 


Ian Snagging some of his homebrew from the tap.


Nick getting a drink.  Needless to say we didnt get much done this night. 


Ground down the inside of the cedar strip side pieces. 
.
Dusty as shit.


Learned my lesson from sanding cedar.  I left this thing on all night so i was able to breathe for the rest of the week. 


Cockpit seat / side panels fitted and done.  


Floor cut and fit.


Bow Sprit hole drilled.  Building a similar articulating setup to the PDX guys with a bit of my own twist using arched harken track and foam.  More on this in the next few weeks. 


A few pics from Heineken High Preforamnce Dinghy Open. 

Sailing day 1 over.  Free Heineken starts now. 


Not hiking hard enough and getting a tan line from my Merica headband. 


Nearing windward mark frigging two boat lengths behind Ben. 


My Soling and PHRF team cleaning house at the fall banquet.